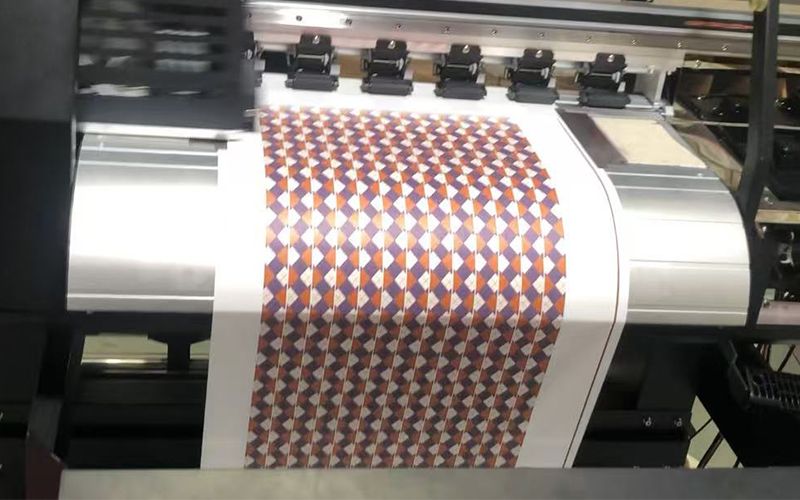
Ever tried printing on both sides of a lanyard and ended up with colors misaligned or designs looking off? I’ve been there too. Let me walk you through how I fixed that.
To print double-sided lanyards with a lanyard heat press machine, you need the right materials, proper design alignment, and a stable machine setup. This ensures vibrant colors and perfectly matched front-and-back designs.
Let’s break it down step by step.
First things first—you don’t need a massive factory to do this. I started with just a reliable lanyard heat press and a bit of trial and error. Here’s your basic toolkit:
To print double-sided lanyards, you’ll need:
A double-sided Lanyard heat press machine (I use the FLYING brand one — lanyard heat press machine)
Sublimation printer with high-quality sublimation ink
Sublimation paper , protection paper (optional per lanyard materials )
Polyester or woven lanyard tape (about 15-60mm wide)
One roll mirrored sublimation transfer paper (front and back designs in the same direction)
Here’s a tip: Go with lanyard materials that can handle heat well—polyester works best in my experience.

Alignment is everything.
Print the front and back designs of the lanyard in the same direction on the transfer paper, and make sure the sizes of artwork layout are uniformed , this is the key to alignment perfectly .
Use design software like Adobe Illustrator or CorelDRAW. Keep your resolution high (at least 300 DPI), and always test with a sample print.
Avoid putting small text too close to the edges .
Every machine is different, but my FLYING lanyard press has a few lifesaving features: stable pressure control, anti-deviation blanket, and dual alignment tracks.
Preheat your lanyard heat press to 200°C (392°F), adjust the printing speed per lanyard materials .
If you're using a Flying double-sided heat press machine, here’s the full setup and shutdown process I follow:
Make sure the machine is grounded properly. Wiring should be:
Live wire → L1, L2, L3
Neutral wire → N terminal
Ground wire → marked position on machine
Inside the control cabinet, push the breaker and operation on panel:
Press the "POWER" button
Press the "INVERTER START" button
Press the "REV/FWD" button, adjust speed using the Frequency Control panel, then press the knob to confirm
Press "HEAT" and set temperature (default: 220°C)
Once the temperature is stable, run a small ribbon test. Adjust temperature if needed for better results.
Load the machine in this order:
Feed protection paper (also called tissue paper) flat into the roller
Then feed sublimation paper and ribbon together
They’ll pass through the rollers and come out via the tape rack
You can see exactly how I do this in this video: Watch the setup on YouTube
While transferring, you can tweak the roller speed depending on the print result—slow down for deeper colors, speed up for faster production.
When you're done:
Turn off the "HEAT" button and let the machine cool to 80°C
Then turn off "REV/FWD", then "FREQUENCY START", then "POWER", then the 3P air switch, and finally the leakage circuit breaker
Always make sure someone is present while powering off
In emergencies, press "POWER" and "HEAT" together. The machine will enter auto cooling mode and shut down after about 3 hours
Oh, I’ve had my fair share of crooked prints and blurry logos.
To avoid common printing issues, always test alignment first,Print the front and back designs of the lanyard in the same direction on the transfer paper, and make sure the sizes of artwork layout are uniformed .
And here’s a hard lesson I learned: humidity affects results. If your workspace is humid, keep your sublimation paper in a dry box.
Also, double-check that both designs face the correct direction. I once printed a batch with one side upside down. Oops.
You’re almost done—don’t skip this part.
After printing, cool the lanyards flat, attach metal clips or hooks, and inspect for quality before packing.
Any wrinkling? Gently re-press with a Teflon sheet on top. Frayed edges? A quick heat sealer fixes that.
If you're selling to clients, presentation matters. Roll them neatly or hang them in bundles—it makes a big difference.
Printing double-sided lanyards with a heat press doesn’t have to be complicated. With the right machine, good prep, and a few hands-on tips, you can deliver professional results every time.
And trust me, once you’ve nailed your first batch, it’s kind of addictive.
Contact: Lynne
Phone: +86 135 3266 0169
E-mail: info@flyingheatpress.com
Whatsapp:8613532660169
Add: No.25 Junda Middle Road , Dongkeng Town , Dongguan City , Guangdong Province , China ,523445
We chat
